
SOLVED: Windows Power Mode Performance Issues
Is your Windows laptop or desktop underperforming despite having powerful hardware? Power mode settings might be silently throttling your PC’s performance, causing laggy applications, slow processing speeds, and frustrating delays. This comprehensive guide reveals how Windows power plans affect system performance and provides step-by-step solutions to unlock your computer’s full potential.
Understanding Windows Power Mode Performance Problems
Windows power modes control how your PC balances energy consumption with performance. When set incorrectly, these settings dramatically limit your processor speed, graphics performance, and system responsiveness, even when plugged into power. Many users unknowingly operate in battery-saving modes that cap CPU performance at 50% or lower, creating bottlenecks that make even basic tasks feel sluggish.
The three primary power modes, Best Power Efficiency, Balanced, and Best Performance, determine your system’s clock speeds, screen brightness, background activity, and cooling fan behavior. Choosing the wrong mode for your needs creates the performance issues you’re experiencing.
Switch to High Performance Power Plan
The default Balanced power plan prioritizes energy savings over speed, which cripples performance during gaming, video editing, or multitasking. Switching to High Performance mode immediately unleashes your hardware’s capabilities.
How to Enable High Performance Mode
For Windows 10:
- Click the Start button and open Control Panel
- Navigate to Hardware and Sound > Power Options
- If you see High Performance, select it, and you’re done
- If it’s hidden, click Show additional plans to reveal it
- Select High Performance as your active power plan
- Close the Control Panel
For Windows 11:
- Right-click the Start button and select Settings
- Click System from the left sidebar
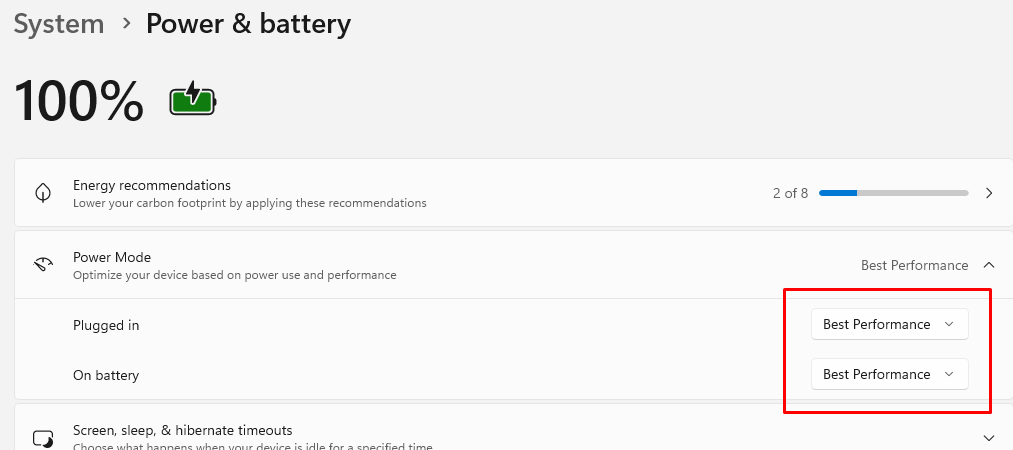
- Select Power & battery
- Click the dropdown next to Power mode
- Choose Best Performance
- For advanced options, click Additional power settings at the bottom
- In the Control Panel window, select High Performance
Create Ultimate Performance Mode (Windows 10/11 Pro)
Windows includes a hidden Ultimate Performance mode that eliminates micro-latencies and maximizes responsiveness for demanding workloads.
Steps to Unlock Ultimate Performance:
- Press Windows + X and select Terminal (Admin) or Command Prompt (Admin)
- Type: powercfg -duplicatescheme e9a42b02-d5df-448d-aa00-03f14749eb61
- Press Enter and wait for confirmation
- Open Control Panel > Power Options
- Select the newly visible Ultimate Performance plan
- Close all windows and restart your PC
Resolve Underlying System Issues with Fortect
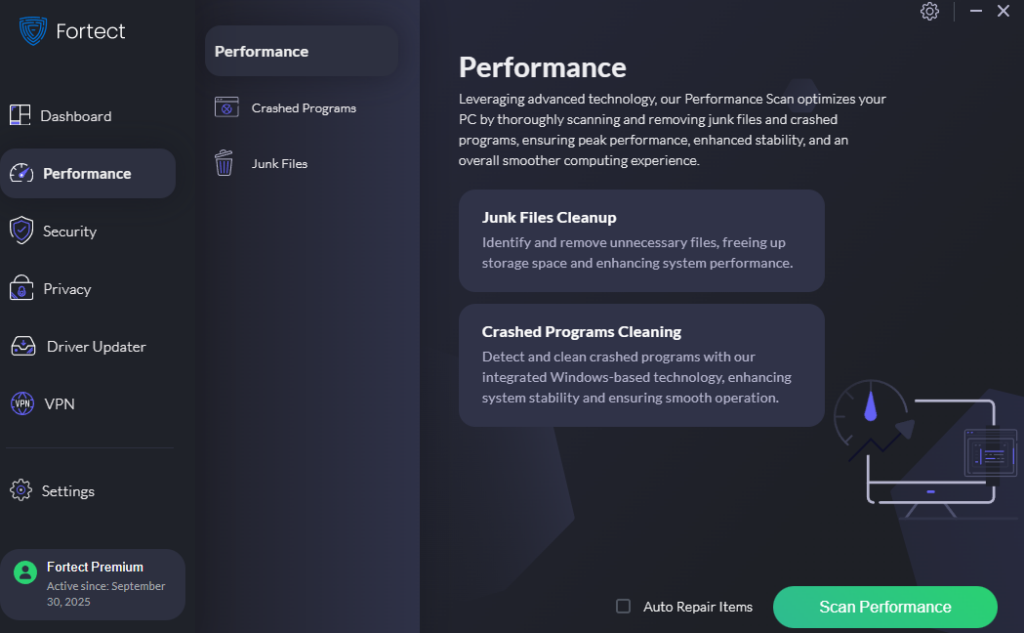
When Windows power mode performance issues persist despite adjusting your power plan settings, corrupted system files, damaged power configuration data, and outdated drivers frequently contribute to continued throttling and sluggish performance. Fortect provides comprehensive system optimization that directly tackles these hidden obstacles.
Fortect includes an integrated system scan that detects and removes temporary clutter, leftover files, malfunctioning apps, and damaged system elements that can disrupt power settings. By cleaning up these hidden issues, it helps restore stable system behavior and allows your selected power plan to work as intended. The result is smoother, more consistent performance, so your Windows PC operates at the level your hardware is actually capable of, without unnecessary slowdowns holding it back.
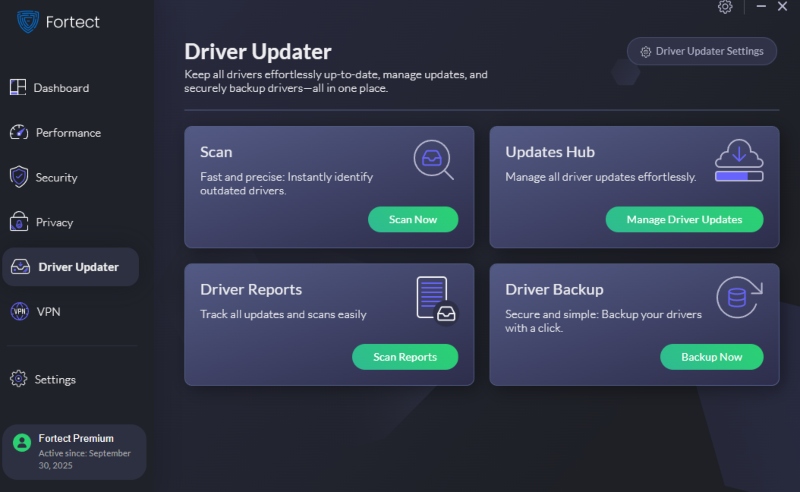
The software’s Driver Updater feature proves particularly valuable for resolving Windows power mode performance issues, as it identifies and replaces outdated or corrupted chipset, processor, and power management drivers with secure, verified versions from trusted sources. Since faulty drivers are among the most common causes of power plan malfunctions and unexpected performance throttling, keeping them up to date with Fortect effectively eliminates these issues while strengthening your PC’s overall stability, security, and computing experience.
Download and install Fortect now.
Adjust Advanced Power Settings for Maximum Performance
Hidden within each power plan are dozens of granular settings that control processor states, USB power, PCI Express throttling, and cooling policies. Optimizing these eliminates performance restrictions most users never discover.
Steps to Configure Advanced Power Settings
For Windows 10/11:
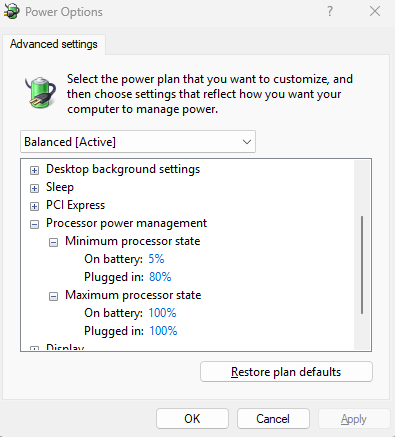
- Open Control Panel > Hardware and Sound > Power Options
- Click Change plan settings next to your active power plan
- Select Change advanced power settings
- Expand Processor power management
- Set Minimum processor state to 100% for both “On battery” and “Plugged in”
- Set Maximum processor state to 100% for both settings
- Change System cooling policy to Active for both
- Expand PCI Express > Link State Power Management
- Set to Off for both battery and plugged in
- Expand USB settings > USB selective suspend setting
- Set to Disabled for both options
- Click Apply then OK
- Restart your computer
Disable Power Throttling for Specific Applications
Windows 10 and 11 include Power Throttling, a feature that limits background application performance to save battery. Unfortunately, it sometimes throttles programs you’re actively using, causing stuttering and slowdowns.
How to Turn Off Power Throttling
For Windows 10:
- Open Settings (Windows + I)
- Navigate to System > Battery
- Click Battery usage by app
- Select the application experiencing performance issues
- Uncheck Let Windows decide when this app can run in the background
- Choose Reduce the work the app can do when it’s in the background and uncheck it
- Repeat for all performance-critical applications

For Windows 11:
- Press Windows + I to open Settings
- Select System > Power & battery
- Scroll down and click Battery usage
- Click the three dots next to any app experiencing slowdowns
- Select Manage background activity
- Choose Let this app run in the background
- Close Settings
Fix Processor Performance Throttling Issues
Sometimes Windows thermal management or BIOS settings override your power mode choices, artificially limiting CPU performance even in High Performance mode. Identifying and correcting these issues restores proper processor speeds.
Steps to Check and Fix CPU Throttling
For Windows 10/11:
- Press Windows + R to open Run
- Type perfmon /rel and press Enter to open Performance Monitor
- Click Performance Monitor in the left panel
- Click the green + icon to add counters
- Expand Processor Information and select % of Maximum Frequency
- Click Add, then OK
- Observe the graph—if it consistently stays below 80%, throttling is occurring
- Open Control Panel > System and Security > System
- Click Advanced system settings on the left
- Under Performance, click Settings
- Select Adjust for best performance or choose Custom and enable only essential visual effects
- Click Appl,y then restart
Prevent Windows from Changing Power Plans Automatically
Windows sometimes switches your power plan automatically based on battery status, user activity, or system updates. This behavior undermines your performance settings and requires intervention.
How to Lock Your Power Plan
For Windows 10/11:
- Press Windows + R and type gpedit.msc (only available on Pro versions)
- Navigate to Computer Configuration > Administrative Templates > System > Power Management
- Double-click Select an active power plan
- Choose Enabled
- In the dropdown, select High Performance or your preferred plan
- Click Apply then OK
- Close Group Policy Editor
For Windows Home users:
- Create a Registry backup first
- Press Windows + R and type regedit
- Navigate to: HKEY_LOCAL_MACHINE\SYSTEM\CurrentControlSet\Control\Power\User\PowerSchemes
- Note the ActivePowerScheme value (this is your current plan’s GUID)
- Monitor if Windows changes this value unexpectedly
- Reapply your preferred power plan through Control Panel if it changes
Disable Modern Standby for Desktop Performance
Modern Standby (also called S0 Low Power Idle) keeps your PC partially awake, draining battery and sometimes causing performance anomalies when resuming. Disabling it on desktops improves consistency.
Steps to Disable Modern Standby
For Windows 10/11:
- Press Windows + X and select Terminal (Admin)
- Type: powercfg /a to check current sleep states
- If you see “S0 Low Power Idle,” Modern Standby is active
- Type: reg add HKLM\System\CurrentControlSet\Control\Power /v PlatformAoAcOverride /t REG_DWORD /d 0 /f
- Press Enter
- Restart your computer immediately
- Verify by running powercfg /a again—S0 should no longer appear
Quick Fixes for Power Mode Performance Issues
Before extensive troubleshooting, try these immediate solutions that resolve most power-related performance problems:
- Update Windows: Press Windows + I, go to Windows Update, and install all available updates
- Update BIOS: Visit your PC manufacturer’s website for the latest BIOS version
- Clean your cooling system: Dust buildup causes thermal throttling that overrides power settings
- Check battery health: Degraded batteries trigger aggressive power saving on laptops
- Disable fast startup: Control Panel > Power Options > Choose what the power buttons do > Uncheck “Turn on fast startup.”
Windows power mode performance issues stem from misconfigured settings, hidden throttling mechanisms, and system-level restrictions that prevent your hardware from operating at full capacity. By selecting appropriate power plans, adjusting advanced settings, disabling automatic throttling, and maintaining system health, you’ll eliminate performance bottlenecks and experience the responsive, powerful computing your hardware was designed to deliver.


