How to Prevent Virtualization Escape Attacks
Virtualization has become a core part of modern computing, from running multiple operating systems on a single PC to sandboxing suspicious files. But with that power comes a serious security risk: virtualization escape, also known as a VM escape or hypervisor escape. Understanding how these attacks work and how to stop them is essential for anyone using virtual machines on Windows 10 or 11.
What Is Virtualization Escape?
A virtualization escape attack occurs when malicious software breaks out of a virtual machine (VM) and gains access to the underlying host operating system or other VMs running on the same hardware. In simpler terms, the attacker “escapes” the isolated environment that the VM is supposed to provide.
Why Virtualization Escape Is Dangerous
Virtual machines are commonly used for testing software, isolating risky browsing sessions, and running legacy applications. The assumption is that anything inside the VM stays inside. A successful virtualization escape shatters that assumption.
When a VM escape occurs, an attacker can:
- Access files and data on the host machine
- Move laterally to other VMs on the same system
- Bypass security tools that only monitor the guest OS
- Gain elevated privileges on the host
Common Causes of VM Escape Vulnerabilities
Virtualization escape attacks typically exploit weaknesses in:
- Hypervisor software (e.g., Hyper-V, VMware, VirtualBox) with unpatched vulnerabilities
- Shared resources like clipboard, drag-and-drop, or shared folders between guest and host
- Virtual device drivers that process guest input insecurely
- Guest-to-host communication channels that can be manipulated
How to Prevent Virtualization Escape on Windows 10/11
Preventing VM escape requires a layered approach, keeping software updated, limiting shared features, and hardening system settings. Here is what Windows users can do.
Strengthen Your PC Security with Fortect

Before diving into manual configuration steps, it’s worth knowing that a dedicated security tool can add a critical extra layer of defense against threats like virtualization escape. Fortect delivers advanced real-time malware protection for Windows users, automatically scanning your PC for both traditional and emerging threats, including virtualization escape attempts, eliminating them safely, and restoring any damaged system files for improved performance. Its robust threat-detection engine monitors suspicious activity and alerts you before harmful actions can take place, helping keep your device secure and running efficiently.
Beyond security, Fortect’s built-in performance scanner optimizes your PC by scanning and removing junk files and crashed programs, ensuring peak performance, enhanced stability, and an overall smoother computing experience, all in one place.
Download and install Fortect today for your Windows system.
Defend your Systems with Fortect for Mac
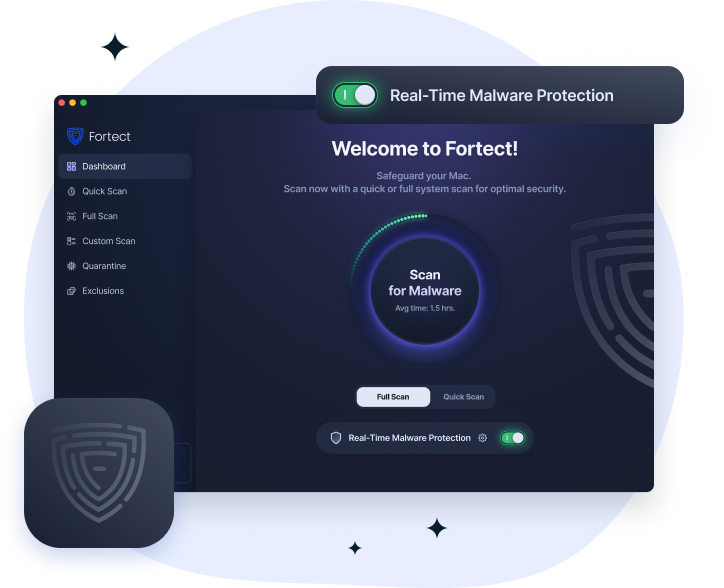
Fortect for Mac strengthens your defense against Virtualization Escape Attacks, a growing threat where attackers break out of virtual environments to access the host system. As cyber threats evolve beyond traditional Windows targets, macOS users are increasingly at risk, especially from sophisticated exploits that bypass built-in protections. Relying solely on native macOS security is no longer enough.
Fortect works alongside Apple’s security framework, adding an extra layer of real-time protection that detects and blocks suspicious behavior before it can escalate. Combining intelligent malware defense, cloud-based threat analysis, and deep system scanning, it helps identify vulnerabilities that could be exploited in virtualization escape scenarios. This proactive approach reduces the risk of attackers gaining control beyond isolated environments, keeping both your virtual machines and host system secure.
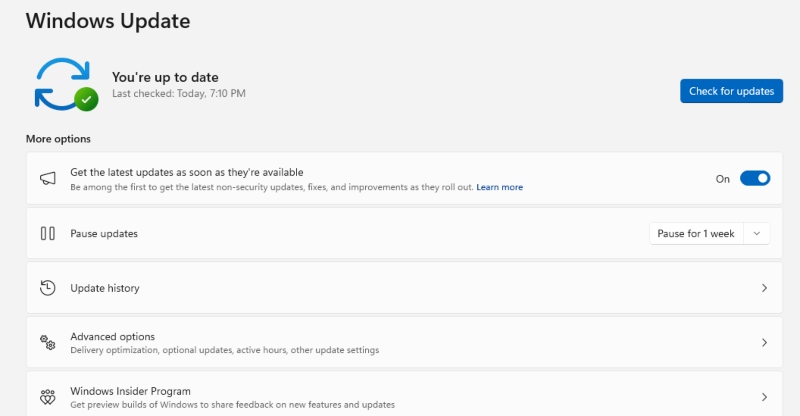
Keep Windows and Virtualization Software Updated
Outdated software is the number one entry point for virtualization escape exploits. Patches regularly address hypervisor-level vulnerabilities.
How to update Windows 10/11:
- Press Windows + I to open Settings.
- Go to Windows Update (Windows 11) or Update & Security > Windows Update (Windows 10).
- Click Check for updates.
- Install all available updates, including optional driver updates.
- Restart when prompted.
How to enable automatic updates:
- Open Settings > Windows Update.
- Click Advanced options.
- Toggle Receive updates for other Microsoft products to On.
- Set Active hours so updates don’t interrupt usage, then let Windows handle the rest automatically.
Also, update your virtualization platform (Hyper-V, VMware Workstation, VirtualBox) directly from the vendor’s website whenever new versions are released.
Disable Unnecessary Guest-to-Host Features
Shared features between the VM and host create attack surfaces. Disabling what you don’t need significantly reduces risk.
Features to disable or limit:
- Shared clipboard – disabling this prevents malicious code from using clipboard data to transfer payloads between guest and host
- Drag-and-drop – limits file movement between environments
- Shared folders – avoid mounting host folders inside VMs unless necessary
- USB passthrough – disable direct USB device access from within the VM
In VMware Workstation, go to VM > Settings > Options > Guest Isolation and uncheck “Enable drag and drop” and “Enable copy and paste.”
In VirtualBox, go to Settings > General > Advanced and set both Shared Clipboard and Drag’n’Drop to Disabled.
Use Hyper-V with Virtualization-Based Security (VBS)
Windows 10/11 Pro and Enterprise users have access to Virtualization-Based Security (VBS), a feature that uses Hyper-V to create an isolated, hardware-enforced memory region, making escape attacks significantly harder.
How to enable VBS on Windows 10/11:
- Press Windows + R, type msinfo32, and press Enter.
- Check that Virtualization-based security shows as Running. If not, proceed below.
- Open Settings > Privacy & Security > Windows Security > Device Security.
- Click Core isolation details.
- Toggle Memory integrity to On.
- Restart your PC.
How to enable Hyper-V (required for VBS):
- Press Windows + R, type optionalfeatures, and press Enter.
- Check Hyper-V and click OK.
- Restart your PC when prompted.
Note: Enabling Hyper-V may affect performance in third-party VMs like VMware or VirtualBox. Check compatibility before enabling.
Restrict User Accounts and Limit Privileges
Running VMs under a standard (non-admin) user account reduces the impact of a successful virtualization escape. If the attacker escapes into a limited account, their ability to damage the host is restricted.
How to create a standard user account on Windows 10/11:
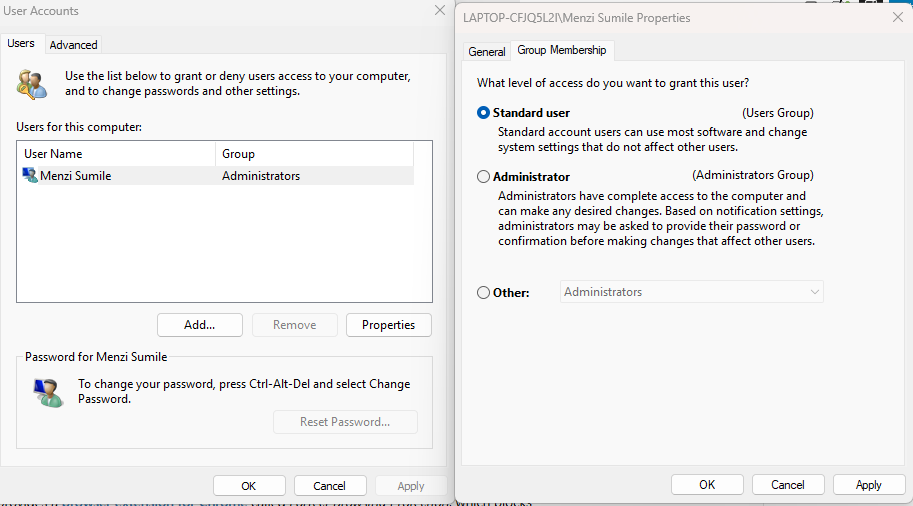
- Open Settings > Accounts > Family & other users.
- Click Add account (Windows 11) or Add someone else to this PC (Windows 10).
- Select I don’t have this person’s sign-in information, then Add a user without a Microsoft account.
- Enter a username and password, then click Next.
- Once created, click the new account and select Change account type.
- Set the account type to Standard User and click OK.
Use this standard account when running virtual machines for everyday tasks. Only switch to an administrator account when making system-level changes.
Enable Windows Defender Credential Guard
Credential Guard uses virtualization to protect credential data from being accessed by malicious processes, including those that may have escaped a VM.
How to enable Credential Guard on Windows 11:
- Press Windows + S, search for Edit Group Policy, and open it.
- Navigate to: Computer Configuration > Administrative Templates > System > Device Guard.
- Double-click Turn On Virtualization Based Security.
- Select Enabled.
- Under Credential Guard Configuration, select Enabled with UEFI lock.
- Click Apply and OK, then restart your PC.
Credential Guard requires Windows 11 Pro, Enterprise, or Education.
Keep Snapshots and Backups Current
Even with strong defenses, having clean snapshots and regular backups limits the damage from a successful virtualization escape attack.
- Take VM snapshots before testing unknown software
- Back up the host system using Windows Backup (Settings > System > Storage > Advanced storage settings > Backup options)
- Store backups on a separate drive, not shared with the VM
Additional Best Practices for VM Security
Beyond the core settings above, these habits strengthen overall protection against VM escape and related virtual machine security threats:
- Run VMs on isolated network segments, and avoid bridging the VM directly to your home network when testing unknown files
- Use read-only disk images for testing untrusted software so that changes can’t persist
- Monitor for unusual CPU or memory usage that could signal exploitation attempts
- Avoid running VMs as root or administrator on the host whenever possible
- Choose actively maintained hypervisors, and software that receives regular security updates is a key defense against newly discovered hypervisor vulnerabilities
Conclusion
Virtualization escape is a sophisticated but preventable threat. For Windows 10 and 11 users, the combination of keeping software updated, disabling unnecessary shared features, enabling hardware-enforced security features like VBS and Credential Guard, and practicing good account hygiene goes a long way toward locking down the virtual environment. The more layers of protection in place, the harder it becomes for any attacker to break out of the sandbox and reach the host system.