
How to Detect and Prevent DNS Spoofing on Windows
DNS spoofing is a cyberattack that redirects you from legitimate websites to fake ones without your knowledge. If you’re a Windows user, understanding how to detect and prevent DNS spoofing can protect your personal information, passwords, and financial data from being stolen.
What is DNS Spoofing and Why Should You Care?
DNS spoofing (also called DNS cache poisoning) tricks your computer into connecting to fake websites instead of legitimate ones. When you type “facebook.com,” your computer requests an IP address from a DNS server. Attackers poison your computer’s DNS cache with false information, redirecting you to malicious sites that look identical to the real ones. This is dangerous because everything appears normal; you might think you’re logging into your bank when, in fact, you’re actually handing your password to hackers. DNS spoofing leads to stolen credentials, credit card fraud, malware infections, and identity theft.
Unlike DNS amplification attacks that crash entire websites with fake traffic (a concern for service providers), DNS spoofing directly targets you as an individual Windows user to steal your personal data. This is the threat you need to protect against on your home computer.
How to Tell if You’ve Been Hit by DNS Spoofing

Unexpected Website Redirects
If familiar websites suddenly look different or redirect you to unexpected pages, your DNS may be compromised. Pay attention when banking sites, social media platforms, or email services display unusual layouts or ask you to log in repeatedly.
Browser Security Warnings
Modern browsers alert you when a website’s security certificate doesn’t match its domain name. If you see “Your connection is not private” warnings on sites you regularly visit, this could indicate DNS spoofing, directing you to a fake site.
Check Your DNS Cache for Suspicious Entries
Your Windows computer stores recently visited websites in its DNS cache. Checking this can reveal if attackers have poisoned it.
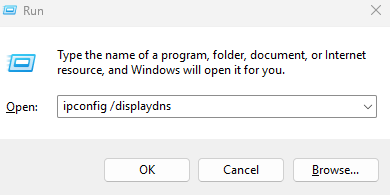
Steps to view your DNS cache:
- Press Windows Key + R to open Run
- Type cmd and press Ctrl + Shift + Enter to open Command Prompt as administrator
- Type ipconfig /displaydns and press Enter
- Look through the results for unfamiliar websites or IP addresses you don’t recognize
- If you see suspicious entries for sites like your bank or email provider, your cache may be poisoned
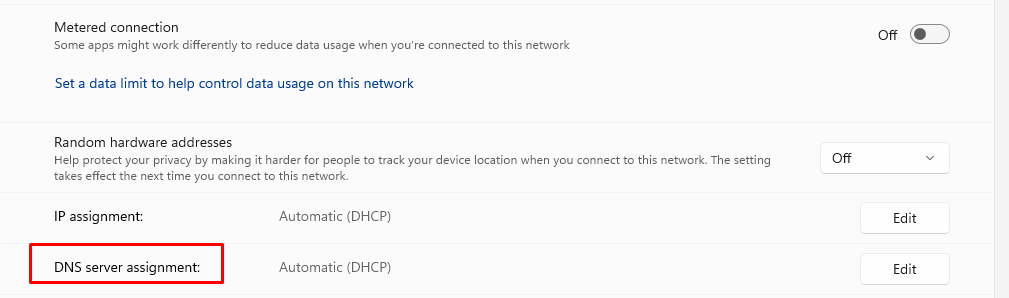
Verify Your DNS Server Settings
Hackers often change your DNS server settings to route all your internet traffic through malicious servers.
Steps to check your DNS settings:
- Press Windows Key + I to open Settings
- Click Network & Internet
- Select Wi-Fi or Ethernet (whichever you’re using)
- Click on your active connection name
- Scroll down and click Edit next to DNS server assignment
- Your DNS should say “Automatic (DHCP)” or show your internet provider’s servers
- If you see unfamiliar numbers like 6.6.6.6 or other strange addresses, your settings may have been hijacked
How to Protect Yourself from DNS Spoofing
Clear Your DNS Cache Immediately
If you suspect DNS spoofing, the first thing to do is flush your DNS cache to remove any poisoned entries.
Steps to flush your DNS cache:
- Press Windows Key + X and select Terminal (Admin) or Command Prompt (Admin)
- Click Yes when asked if you want to allow the app to make changes
- Type ipconfig /flushdns and press Enter
- You’ll see “Successfully flushed the DNS Resolver Cache”
- Close your browser completely and reopen it
- Try visiting your websites again
Do this regularly, especially if you use public Wi-Fi networks where DNS spoofing is more common.
Switch to Secure DNS Servers
Using encrypted DNS servers prevents attackers from intercepting and tampering with your DNS requests. Cloudflare and Google offer free, secure DNS services.
Steps to change to secure DNS (Windows 11):
- Open Settings (press Windows Key + I)
- Go to Network & Internet
- Click Wi-Fi or Ethernet
- Click Hardware properties
- Click Edit next to DNS server assignment
- Select Manual
- Turn on IPv4
- Enter 1.1.1.1 in Preferred DNS (Cloudflare) or 8.8.8.8 (Google)
- Enter 1.0.0.1 in Alternate DNS (Cloudflare) or 8.8.4.4 (Google)
- Set DNS over HTTPS to On (automatic template)
- Click Save
For Windows 10:
- Open Settings and go to Network & Internet
- Click Change adapter options
- Right-click your connection and select Properties
- Select Internet Protocol Version 4 (TCP/IPv4) and click Properties
- Select Use the following DNS server addresses
- Enter 1.1.1.1 and 1.0.0.1 (or Google’s 8.8.8.8 and 8.8.4.4)
- Click OK and close all windows
Keep Windows Updated
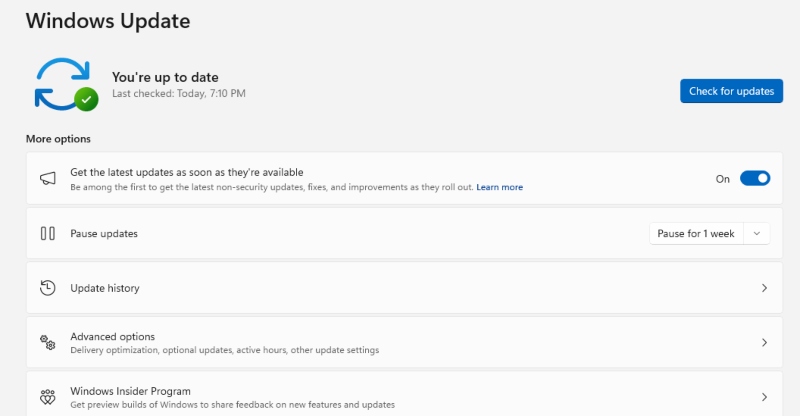
Microsoft regularly patches security vulnerabilities that attackers use for DNS spoofing. Staying updated is one of your best defenses.
Steps to update Windows:
- Press Windows Key + I to open Settings
- Click Windows Update (or Update & Security in Windows 10)
- Click Check for updates
- If updates are available, click Download or Install now
- Restart your computer when prompted
- Go back to Windows Update and click Advanced options
- Turn on Get the latest updates as soon as they’re available
Set your computer to automatically install updates so you never miss critical security patches.
Use Your Router’s Security Features
Your home router is often the first point of attack. Securing it adds another layer of protection against DNS spoofing.
Steps to secure your router:
- Open your web browser and type your router’s IP address (usually 192.168.1.1 or 192.168.0.1)
- Log in with your router credentials (check the sticker on your router if you haven’t changed them)
- Change the default admin password immediately, use something strong and unique
- Look for DNS settings and ensure they match your internet provider, or set them to secure DNS (1.1.1.1 or 8.8.8.8)
- Enable WPA3 or WPA2 encryption for your Wi-Fi
- Check for firmware updates in the settings and install them
Install Antivirus Software with DNS Protection
Quality antivirus programs include DNS protection features that detect and block spoofing attempts in real-time. Windows Defender provides basic protection, but consider dedicated security software for additional safeguards.
Steps to check Windows Security:
- Press Windows Key + I and select Privacy & Security (or Update & Security in Windows 10)
- Click Windows Security
- Click Virus & threat protection
- Ensure Real-time protection is turned on
- Click Manage settings and verify all protections are enabled
- Run a Quick scan regularly to catch threats
Protect Against DNS Spoofing with Fortect
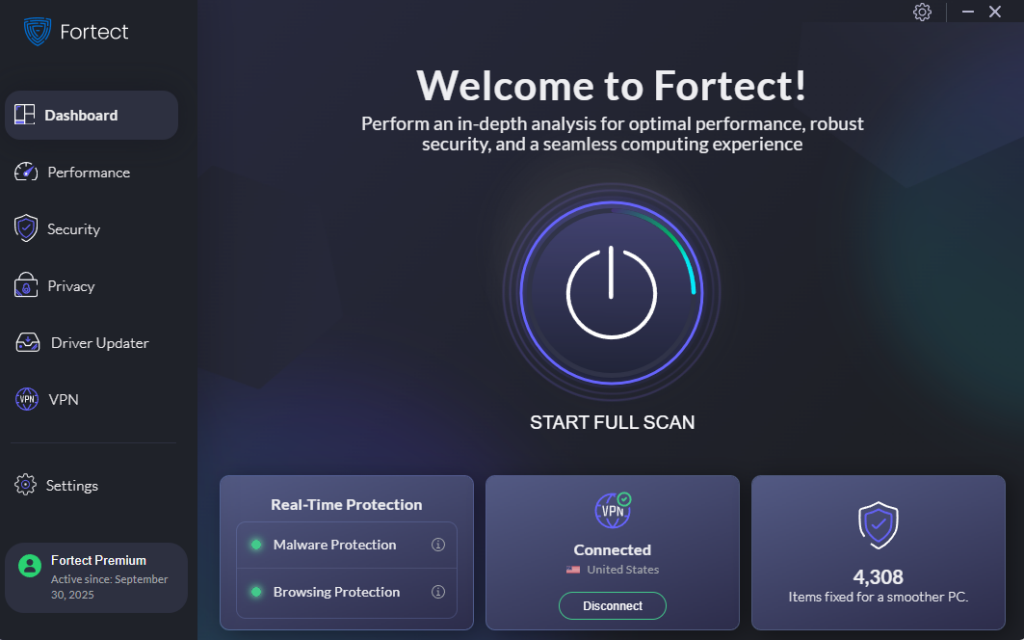
Windows Defender may provide basic protection against common threats, but with today’s increasingly sophisticated cyberattacks, such as DNS spoofing, it’s often not enough. For comprehensive protection, consider using Fortect, an advanced antivirus solution with real-time malware defense. Fortect automatically scans your Windows PC for threats, including DNS spoofing attempts, repairs any damage, and optimizes your system for smoother, faster performance.
Fortect Premium includes a built-in Driver Updater that automatically scans your Windows PC for outdated or corrupted drivers and updates them safely from trusted sources. This feature is critical for preventing DNS spoofing because corrupted or outdated drivers are more than just a performance issue; they can be exploited by hackers to inject malware into your system. Since drivers communicate directly with the system kernel, any compromise can lead to serious instability or even a complete system takeover.
The great thing about upgrading to Fortect Premium is that, aside from its built-in Driver Updater, it now includes a VPN feature that lets you connect securely to any public Wi-Fi network. This added layer of protection helps prevent DNS spoofing and keeps your online activity private, even when you’re on unsecured connections.
Download and install Fortect today for complete protection.
By keeping your drivers updated, Fortect closes these security gaps while ensuring your PC runs smoothly. Once the updates are applied, your computer is optimized for cleaner, faster, and more reliable performance, giving you peace of mind that your system is protected against DNS spoofing and other sophisticated attacks.
Additional Protection Tips
Always verify website URLs carefully before entering sensitive information. Look for “https://” and the padlock icon in your browser’s address bar. Be suspicious of emails or messages containing links, even from known contacts; attackers often use these to redirect you to spoofed sites.
Avoid using public Wi-Fi for banking, shopping, or accessing sensitive accounts, as these networks are hotspots for DNS spoofing attacks. If you must use public Wi-Fi, consider using a reputable VPN service that encrypts all your internet traffic, including DNS requests.
Restart your router occasionally, as some DNS spoofing attacks target home routers directly. A simple restart can clear temporary compromises and force your router to refresh its DNS settings.
By following these steps, you’ll significantly reduce your risk of falling victim to DNS spoofing and keep your personal information safe while browsing the web.


